
This guide takes you from a fresh plugin installation to a working family tree chart on a page. It assumes you have already installed and activated the plugin — see Installation & Activation if not.
Step 1: Create a Family Group #
A Lineage organises your tree data. You need at least one before adding members or importing data. The free version is limit to one lineage.
- Go to AP Family Trees → Lineages
- In the Create Lineage panel, enter a name - for example, Smith Family
- Click Add New Lineage
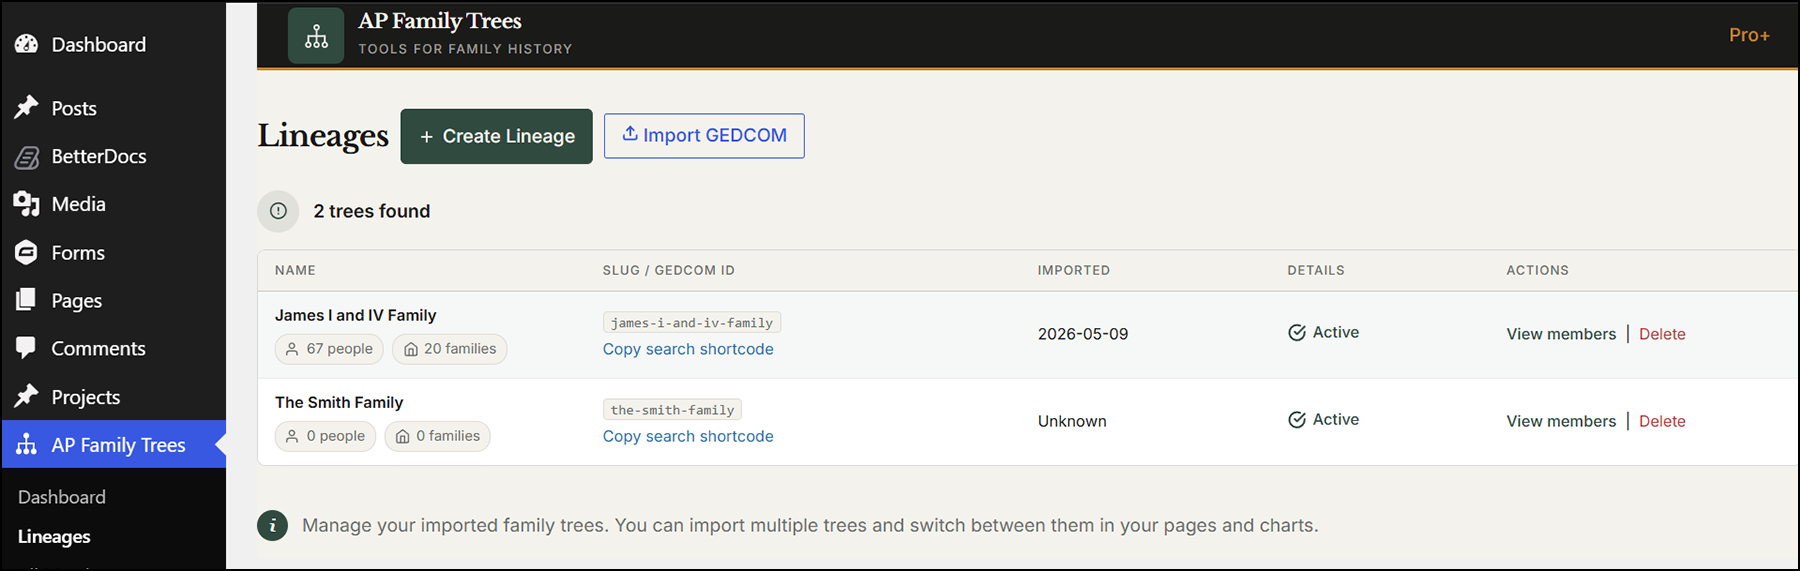
📸 SCREENSHOT: Add a lineage to contain a family of related individuals.
Step 2: Add your family data #
Route A — Import a GEDCOM file (recommended) #
If you have existing genealogy data in a desktop app or on Ancestry.com, MyHeritage, or FamilySearch, export it as a GEDCOM formmated file first. Then go to AP Family Trees → Migration Tools → GEDCOM Import, enter a family name, upload your .ged file, and click Import GEDCOM. Members are created automatically. See Importing from GEDCOM for software-specific export steps.
You should only import a GEDCOM file once if you have edited members in the plugin future imports will over write your changes.
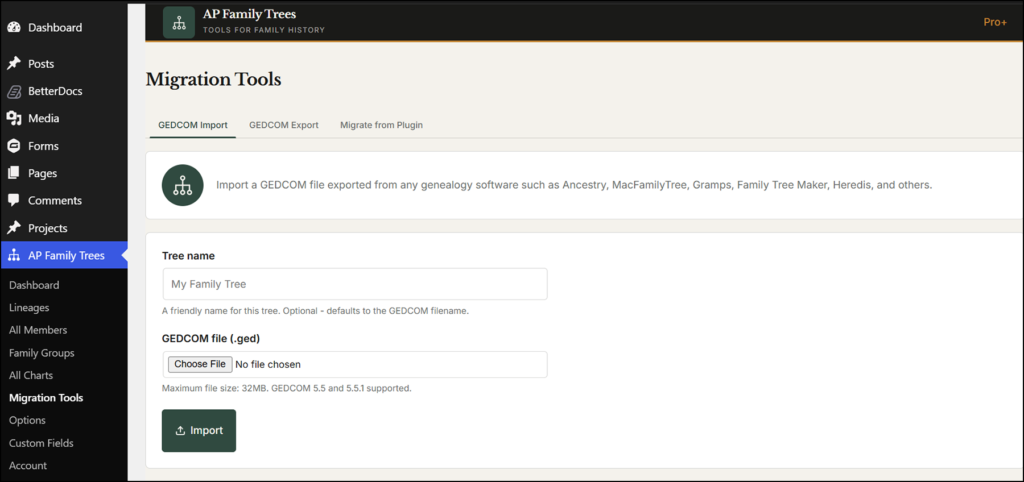
📸 SCREENSHOT: If you have a GEDOM file you can import it in the Migration Tools page.
Route B — Add members manually #
Go to AP Family Trees → All Members → Add Member. Add people starting with the oldest generation — grandparents first, then parents, then children. See Adding Members Manually for field-by-field guidance.
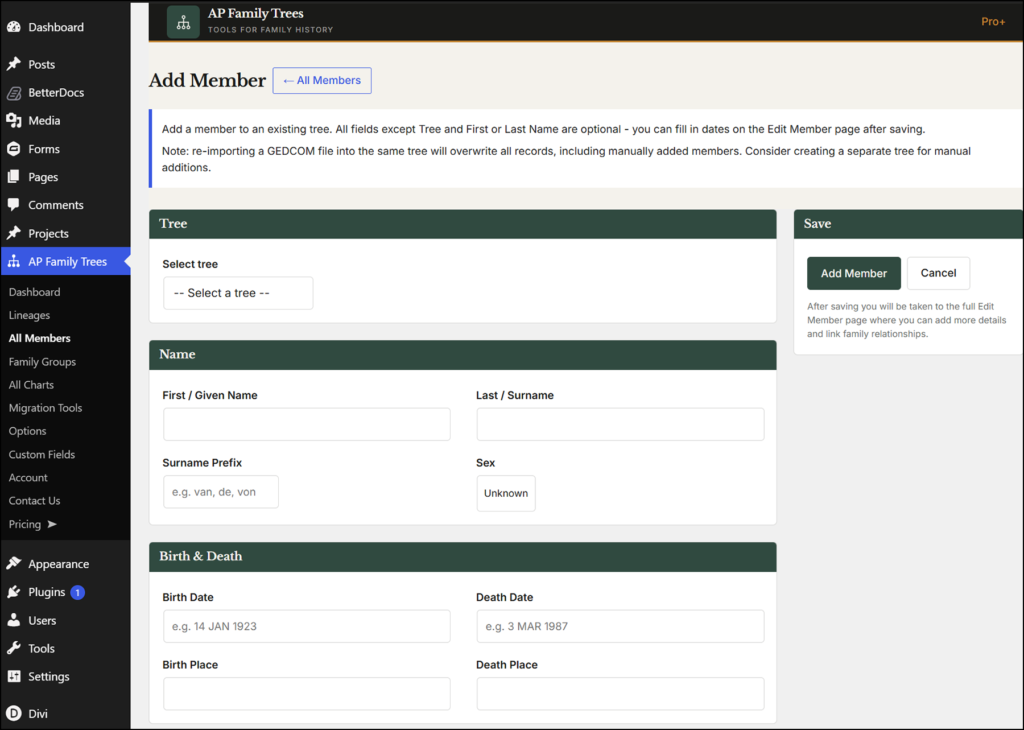
📸 SCREENSHOT: If you want to start by manually adding your first family member use the All Members page.
Step 3: Create a Chart (a 'family tree' to display) #
- Go to AP Family Trees → All Charts
- Give the chart a name — for example, Smith Family Descendant Chart
- In the Chart Settings panel, set:
- Chart Type — Descendant, Ancestor, Pedigree, Hourglass, or Compact Text (options vary depending on licence tier)
- Root Person — the person the chart starts from (found on the All Members page left column)
- Tree — select the lineage you created in Step 1
- Select other options if required
- Click Publish
- Go back to AP Family Trees → Charts and note the ID number for this chart
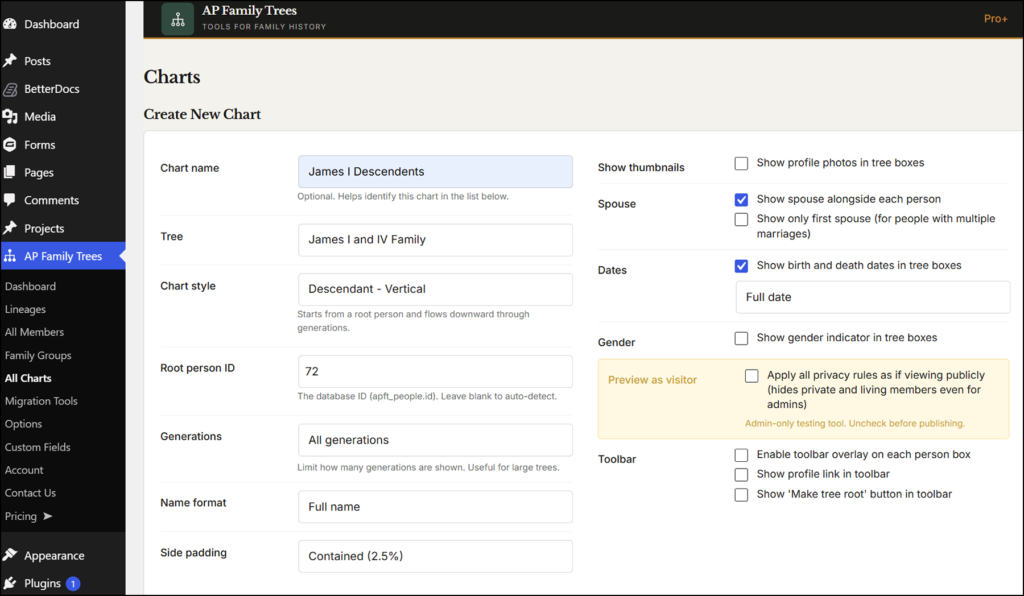
📸 SCREENSHOT: The All Charts page is the place to create a 'family tree' to display on your site.
Step 4: Display the chart on a page #
Create a new WordPress page or edit an existing one. Add a Shortcode or Gutenberg block and enter:
[APFTChart ID=1]Replace "1" with the Chart ID from Step 3. Publish the page and visit it to see your tree. (Shortcodes and IDs both appear in the All Charts list on the All Charts page).
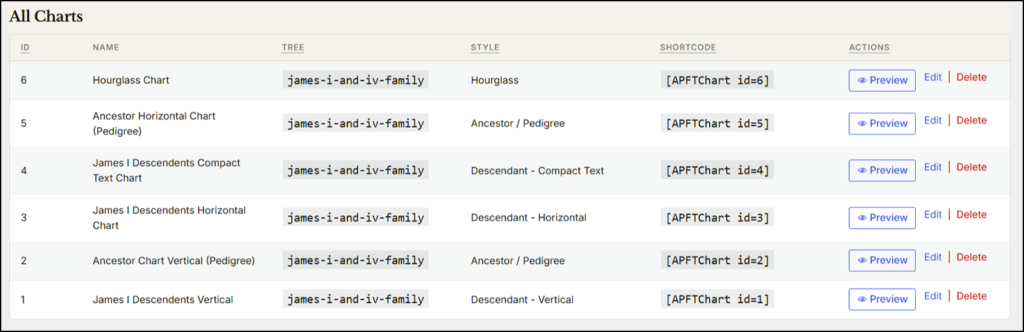
📸 SCREENSHOT: All Charts section on the All Charts page shows chart IDs and chart shortcodes
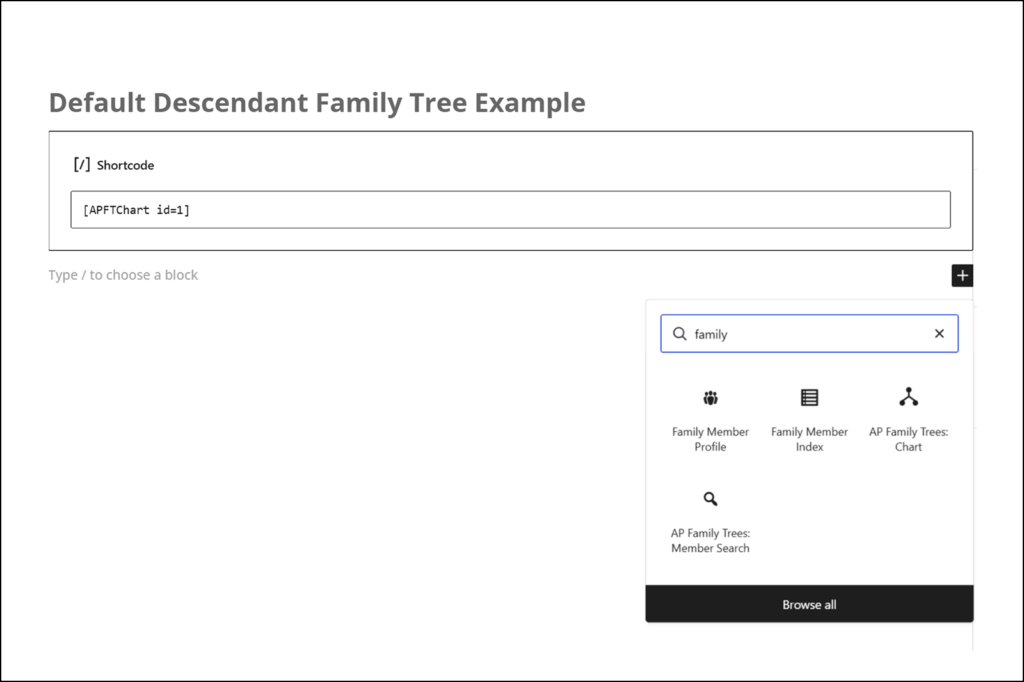
📸 SCREENSHOT: Add the shortcode or select the AP Family Trees: Chart block and place in the page where you want the chart to display. Note that you may want to set the page to ful width (if your theme enables this) to better display wide charts.