
Each family member is stored as a post in WordPress. You can add members one at a time using the member editor. If you have existing genealogy data in another application, importing a GEDCOM file is faster.
Adding a new member #
Go to AP Family Trees → Members → Add New.
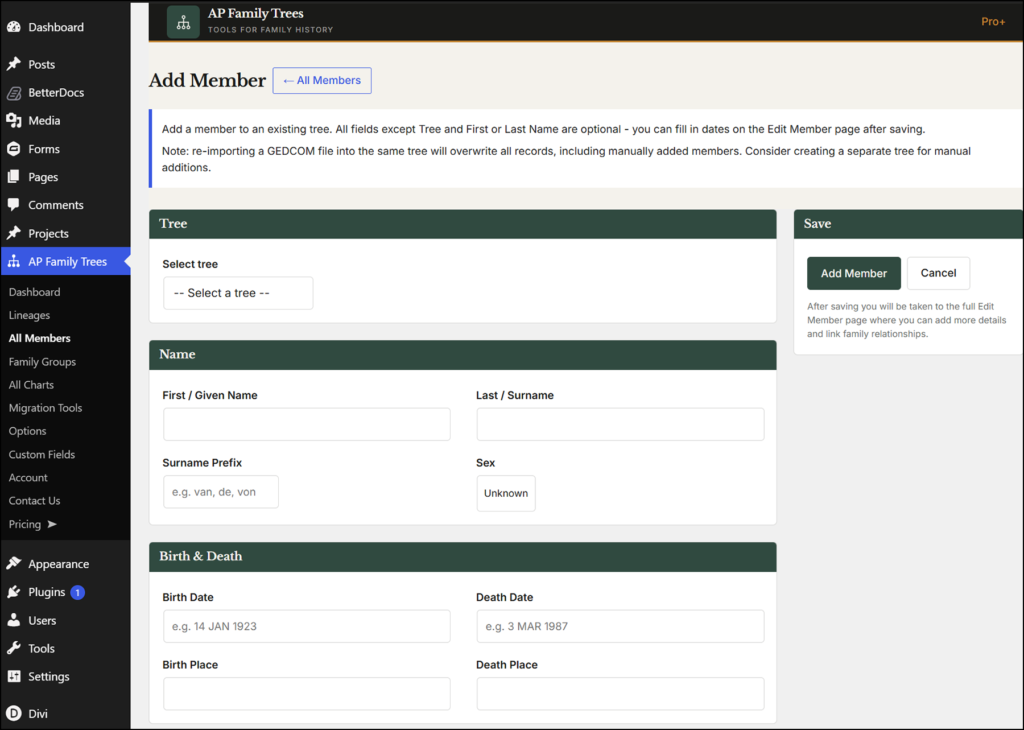
📸 SCREENSHOT: AP Family Trees → All Members → Add Member screen showing the full member editor
Tip: Add members in generational order - grandparents first, then parents, then children. This makes linking parent and child relationships easier as the people you need to reference will already exist when you reach them.
Available fields #
Basic details #
- Name - the post title. Enter as Firstname / Given Name and Last / Surname.
- Sex - Male, Female, or Other. Used for gender-based colour coding on the tree if enabled.
- Date of birth - enter in any consistent format. GEDCOM approximate qualifiers such as Abt 1845 or Circa 1860 are accepted and display as entered.
- Place of birth
- Date of death
- Place of death
- Surname Prefix - free text field for additional information like honorifics
Other Fields Appear After Saving #
- Privacy Flags - options to exclude living and non-living persons from public display
- Photo - image attachment
- Burial - details of burial
- Religious Events - eg Baptism, Confirmation
- Custom Fields - (Pro Plus licence required)
- Family Relationships - parents and children
Relationships link members together so the tree can draw the correct connections. A member does not need to have all relationships set - you can link what you know and leave others blank.
Personal and Pro plan fields #
- Photo gallary - set as the featured image. Displays as a thumbnail in the tree node and on the member profile page.
- Custom fields - add any additional information you want to record against a member.
Assigning to a Family Group #
After filling in the member details, assign the member to a Family Group using the Family Group taxonomy box on the right side of the edit screen. A member must be assigned to at least one Family Group to appear in charts and member lists for that group.
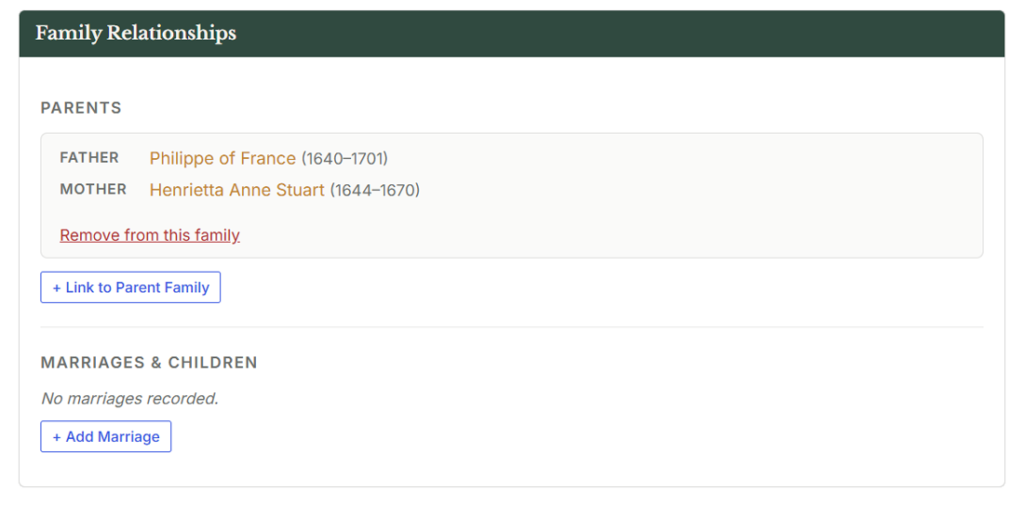
📸 SCREENSHOT: Member edit screen showing the Family Group box
Publishing the member #
Click Update Member to publish. The member is now in your database and available to appear in charts and be linked as a parent, child, or spouse of other members.
Editing and deleting members #
Go to AP Family Trees → All Members to see all members. Use the search box to find a specific person. Click the Edit link on the right to open the edit screen. Deleting a member removes them from the database and from any charts - their relationships to other members are also removed.